
One year from now, I will be strapped in the seat of my car. The timer will be counting down to null and I will be away in a fury of dust, gravel, and misplaced optimism. Or at least that is how I picture it. To be clear, it won’t be my first rally. In addition to co-driving for several PNW events, I have helped organize and volunteer for a number of years. What has held up the driving is that life is very good at keeping certain goals just beyond your reach. That goal for the purpose of this story is actually driving the rally car for once. 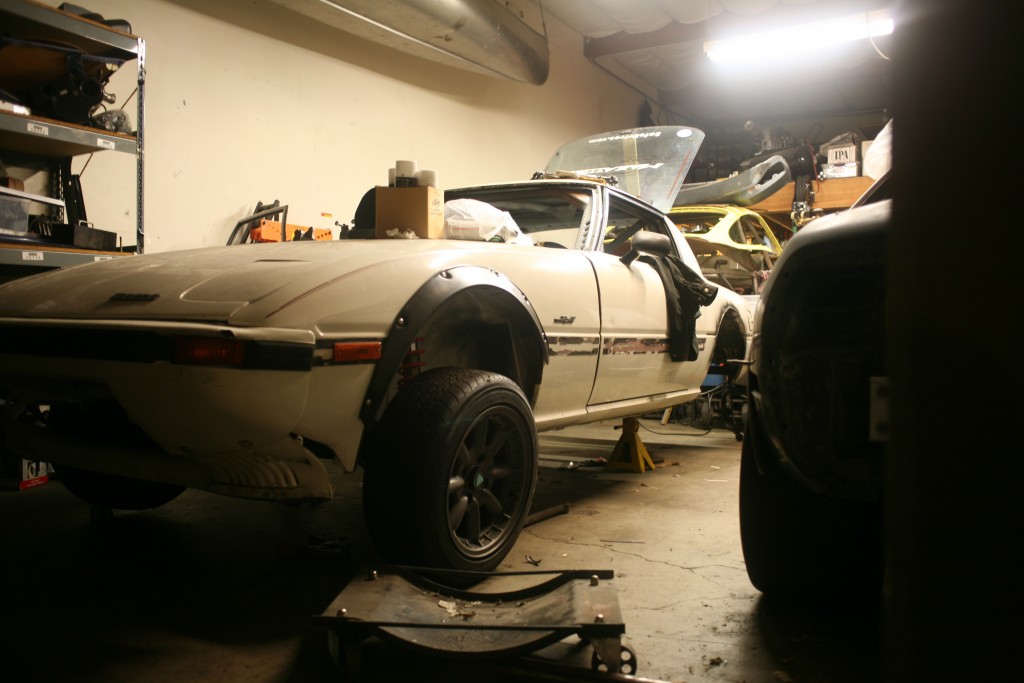
Since my long-term memory is currently inundated with science, I will arbitrarily say I got the car a year ago. A friend in the rally community had put the RX-7 up for sale at a time when I was susceptible to spontaneous purchases. So obviously, I bought it. It’s a 1978 build date, the very first of the RX-7 series. The time spent in Oregon wasn’t kind so there were minor rust problems to contend with. The worst was that it started off life without a sunroof but fell victim to the 1980’s fad of putting in aftermarket sun holes. Cocaine is a hell of a drug. The good news was the cage was logbooked, but very little else was ready on the car. Most of the parts were in boxes and bags. I sorted out the junk, sold what I didn’t need, and actually came ahead 500 dollars on the deal.
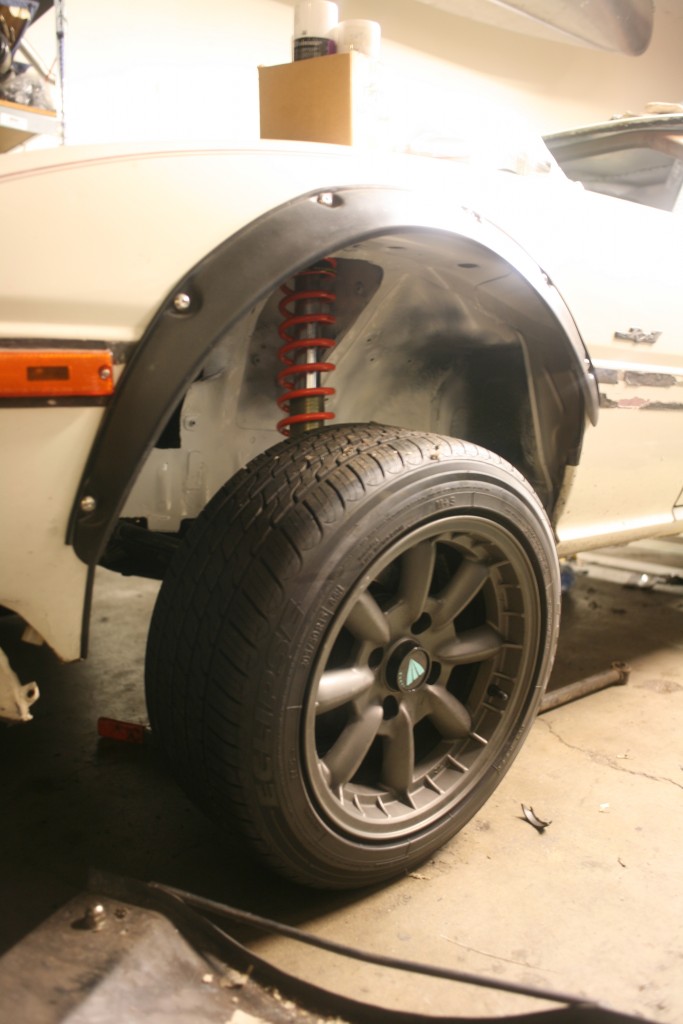
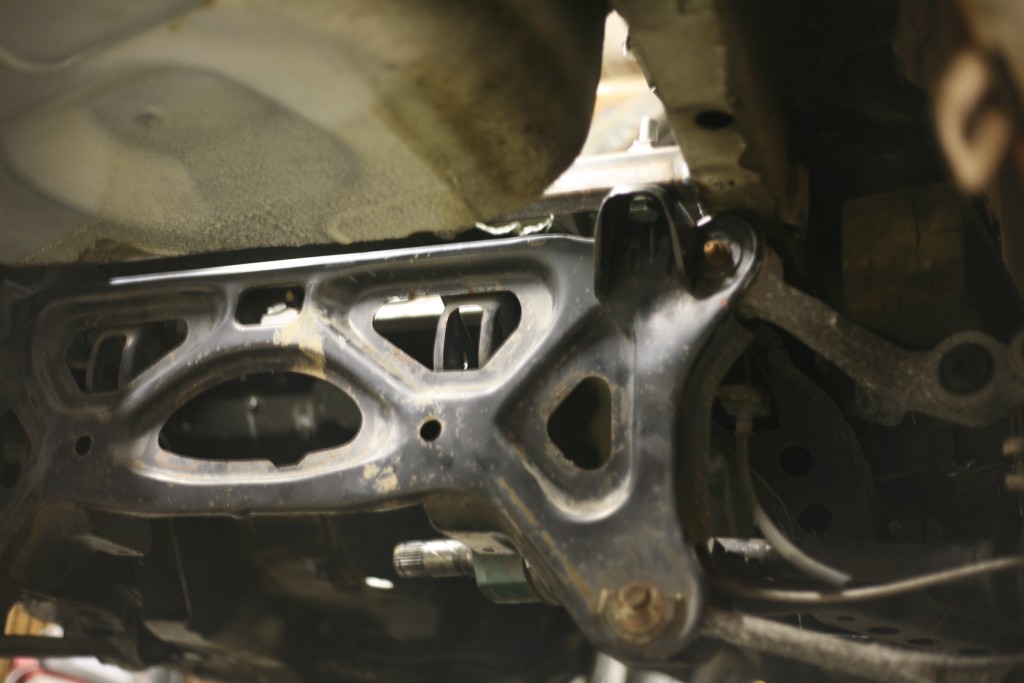
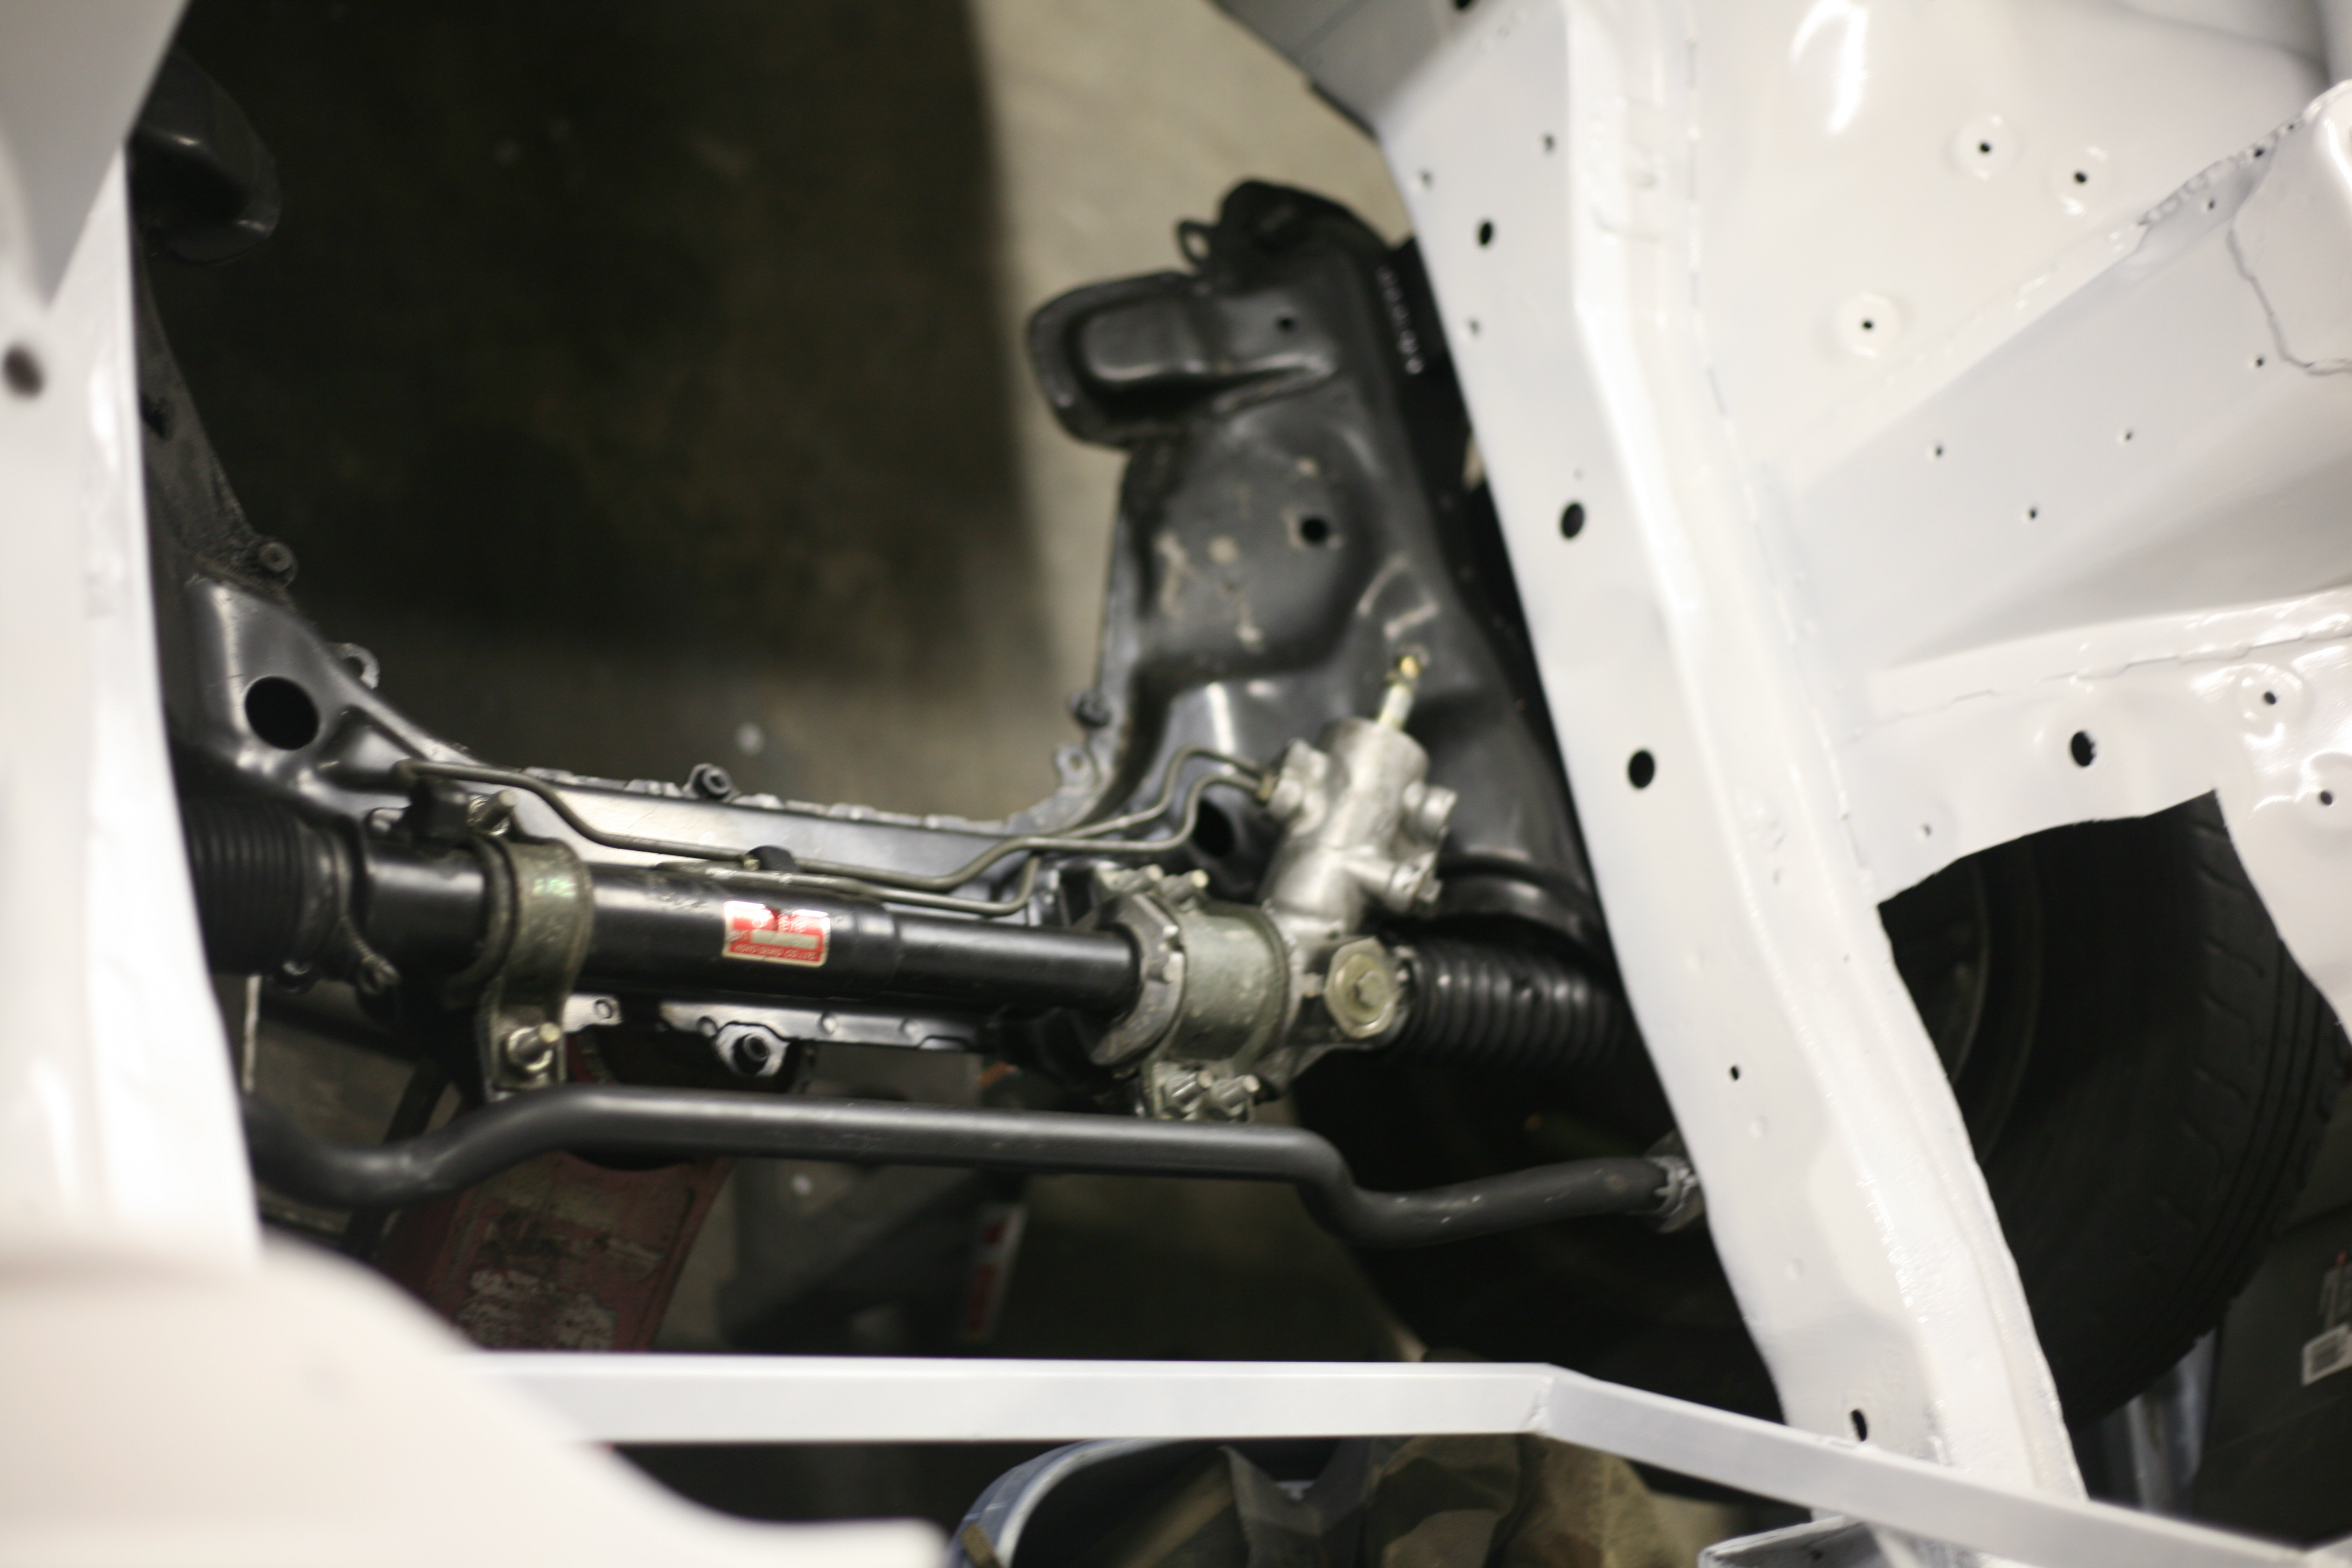
Thankfully I had parts from my last RX-7 rally car and a GSL-SE I recently parted. Many days and nights of tinkering, welding, grinding, and cutting yielded good progress. The easiest was the front suspension. From my previous RX-7 rally car experience, I knew that the factory front suspension was dreadful but could be solved with second generation parts. Dropping the old subframe and truck-like steering components doesn’t take very long either. Its here I discovered that the car had been hit hard sometime in its life, leaving a ripple up the firewall and making it difficult to mount the new subframe. Yikes. I pressed onward. The second generation subframe conversion isn’t new, and certainly not new to me. Despite the frame damage, I took maybe a few hours all told. It helps that Mazda designed much of the FC3S suspension on the first generation car. The real limiting factor is the lower ball joint on the control arm. It will not pivot past a certain angle and restricts some of the travel. I might find a way to deal with it later, but for now I’m not too worried.
The RX-7 was known for being balanced 50/50, which makes sense because the rear suspension sucked too. I fixed the front by converting to the second generation front suspension, steering, brakes, etc. With the front resolved, I quite literally turned to the rear. My plans for the back half of the car were not well thought out. I was initially overzealous about keeping the parts from RX-7s so I decided to retrofit the FD3S suspension. Through some quick Craigslist searches, I brought home some FD rear suspension dropouts and got to work. It took a fair amount of effort, but it made into the car.
The logic was that the 8 inch differential would be strong, with a reasonable link design, the right lug pattern, and good brakes. I made some assumptions that things would work. Turns out I made an “ass” out of “u” and I guess “mptions.” Never really got that idiom. Anyhow, I encountered a few problems that made the whole ordeal a waste of time. One was the dampers mount to the top link which limits the size of the damper. It was bad even with the towers and I couldn’t fit anything to get the travel I wanted. Adding insult to my idiocy, the point where the lower link mounts to the subframe was the lowest point of the car by a few inches. Rally doesn’t take kindly to low hanging parts of cars, so this was not going to cut it. There was no way to go higher. The last straw was that the rear brakes are huge. I couldn’t fit any 15″ wheel I got my hands on over the cursed rotors. Maybe some Compomotive or Braid wheel could have, but I am not a wealthy guy.
What I should have done to begin with was look at the most successful rear-drive rally car to date; the Escort. Originally, Ford produced guides on how to build the Escort into rally car yourself, complete with hand-drawn diagrams and setup data. The practice of giving out such wonderful information has died out, and the guides today are simply a parts list with dollar signs and almost no technical content. I was able to download the scans that circulate the internet and give them a good read. Using the four-link dimensions in the scans, I scaled the values relative to the wheelbase of the RX-7.
For the axle, I still wanted something with more gusto than the stocker. The best bang for buck is the Toyota 8 inch. The gear options are plentiful and cheap. Cheap is good. Cheap gets the car done. For the limited slip, the late 80’s Supra came with an independent variant of the same axle, so the LSD unit can be interchanged. This means 50 dollar clutch-type, limited slip. With the decision made, I took a trip to the junkyard to pick up up from a 4Runner as they have the right axle width. This was actually bit more difficult than I imagined.
I strolled the yard, leaning to the side I carried the tool bag from, beaming with excitement to get my axle. I arrive at the first 4Runner, look underneath, and the third member is gone. Okay, not an issue. Get to the next one, gone. The third one, gone. Every single 8 inch third member in the yard was missing. Every damned one. I assume the rock crawler guys are hoarders and diffs serve as some form of currency in their post-apocalyptic off-road world . It took nearly a month to find the complete axle locally.
So now I had an axle, the right one. The old tabs were torched off, save the panhard mount, and new tabs from JVAB where welded on. The axles were taken to the local drive shaft shop and machined to match the rotors I provided. They only messed it up once too! For the brakes, I choose the Saab 900 rotor and a Volvo 240 rear caliper. This gave me a 4×114.3 lug pattern, a good two-piston caliper, and plenty of wheel clearance. The Volvo caliper shares the pad design with the front 911, so options are very good for pad material.

Its sounds like I’ve accomplished quite a bit, but I really hadn’t. There was a fair amount of time lost in stitch welding, putting in the towers, and hundreds of other small tasks. Next time we will look at how you fit a 6′ foot tall guy in a small car with a roll cage, as well as the fine art of making a four-link from scratch. (That article is HERE)


[…] S6 Avant 1987 Audi Coupe GT1984 Mazda RX-7 GSL-SE 1971 Mazda RX-2 1971 BMW 2002 1972 BMW 20021978 Mazda RX-7 (Rally America logbooked)1987 Mercedes Benz 300D […]
Comments are closed.