
In the second installment of building an RX-7 into a rally car, I’ll discuss building a four link. (Part One is found HERE) The reason I wanted the four link is I wanted my car not to be a twitchy mess. I learned quickly on RX-7 Rally Car v1.0 that the stock rear end geometry makes the car a handful to drive. Inspired by the Ford Motorsports prep manual, I went to work.
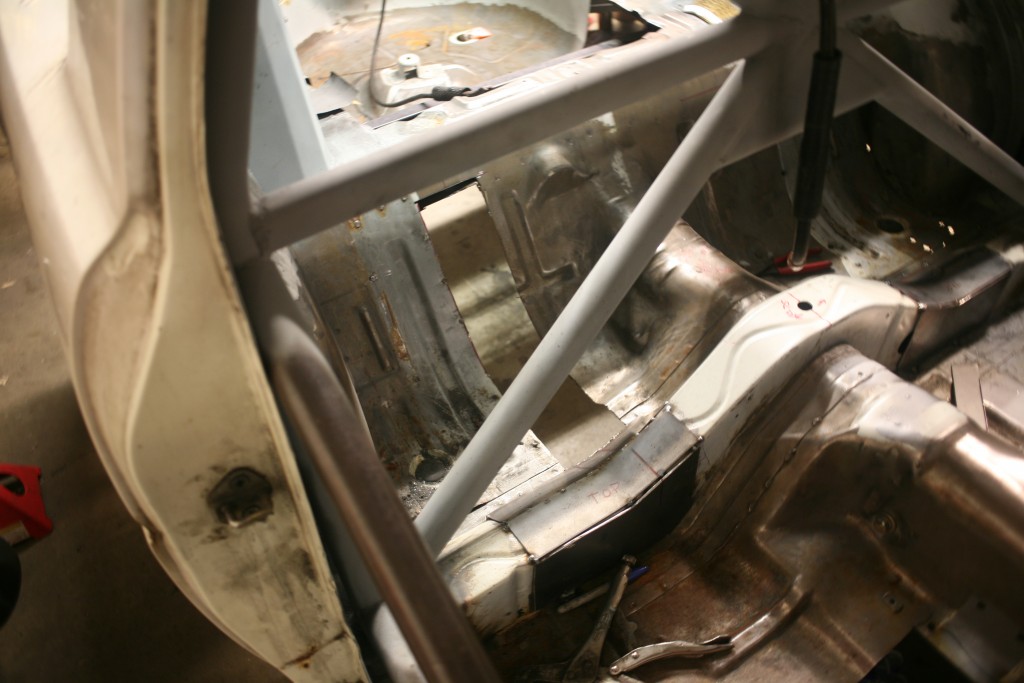
The biggest step is removing all the unneeded brackets from the chassis. I hope you like drilling spot welds and cutting things. Especially upside down so all the sparks, shavings, and dust land on your sensitive areas. Since I previously had the FD3S rear suspension, I had already suffered through this phase. Probably more than I should have I might add. After the offending metal bits are gone, you must cut and cut deeply. The goal is to get the links as long as possible, so you need a channel through the body.
If I was to do it again, I would want another 6″ or so. (That’s what she said). There were discussions on cutting through the center support of the car, and the shorter option won out. At any rate, you’ll likely want to have the link boxes for this step. You can make them by stacking plates and drilling the holes and doing some welding, etc,or buy them. That is up to you.
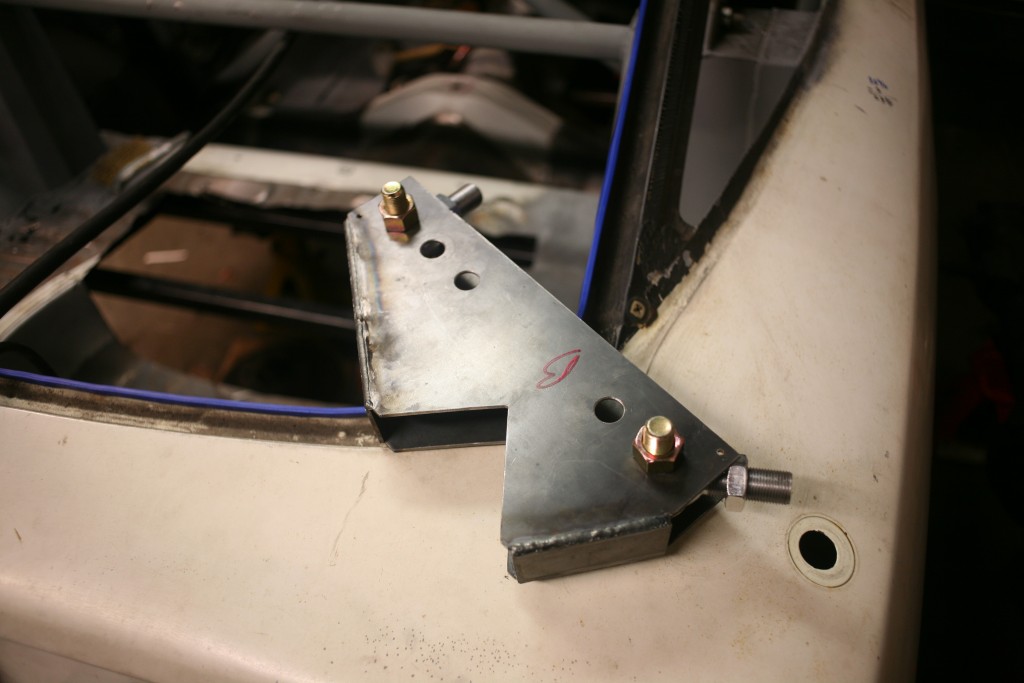
Boxes in hand, you can now accurately trim the body to fit the link boxes. Aw, but how do you keep the boxes parallel you ask? Take two long links with lengths equal to the distance you want between the boxes. Put a bolt through the holes you drilled into the links at the top and bottom holes. This makes it square. Then you need to square this assembly to the chassis. I used a level relative to a known flat spot on the car. Might be other ways to do it too.
When the boxes are set, weld them in. Frankly, I did a mediocre job. Next time would be better. Yay learning curve!
With the axle already done, its time to deal with the links. The right length link is one that gets you as close to the the center of the wheel well as possible, and gives you some adjustment. Remember, in terms of suspension the total link length includes the heims but when buying links, they are sold by their end to end measurement. Next, hang the axle. Once that mess is done, get yourself some tea, beer, or whatever beverage you prefer to give yourself some positive reinforcement. The axle is in. well, sorta.
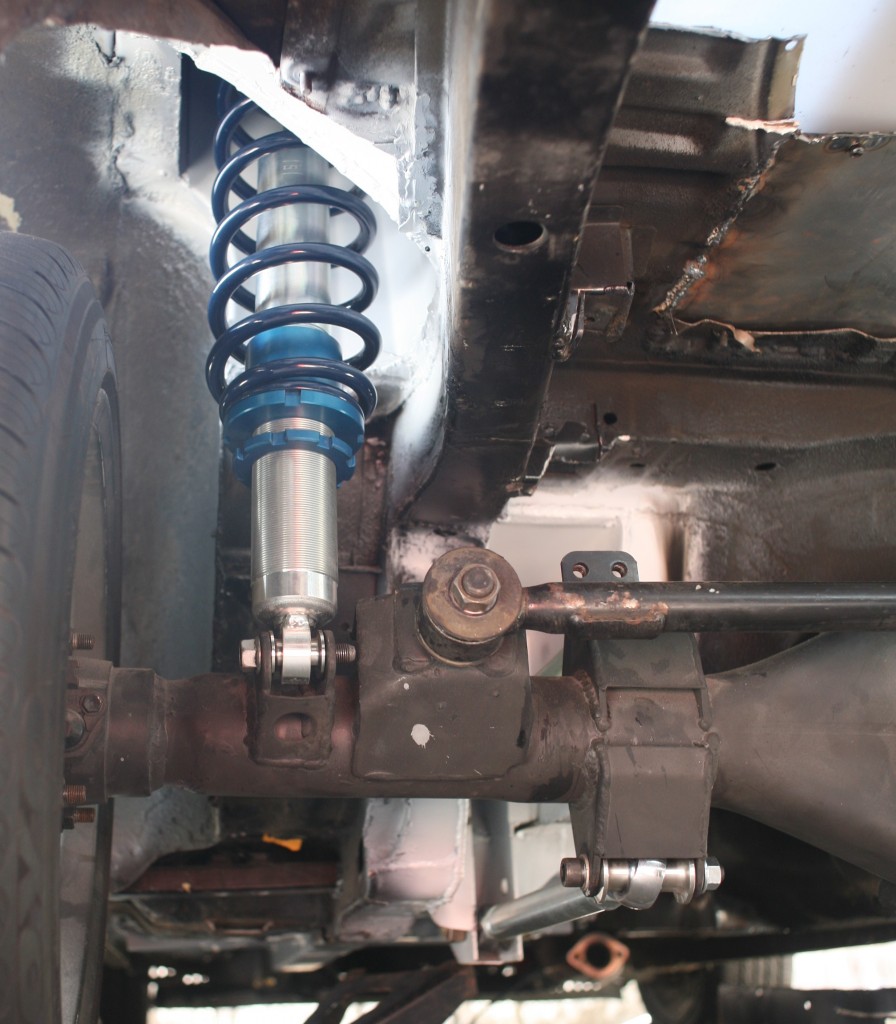
You still have dampers to contend with. I had coilovers for my project. If you have something else, like shocks and spring cups, or God forbid leaf springs, then you may have additional work to do on your own. Or get with the times and get coilovers. Either works.
So how do you get the travel, you might ask. The stroke length is longer than my original mount point, you may exclaim. The answer is towers. Towers can be had commercially, or you can make them. Mine were sourced as the last of a design a rally fellow produced. So I’m no help for a place to buy them. Putting in towers requires the same amount of cutting and profanity that the link boxes required. The position should allow the damper to move up and down relatively vertical.
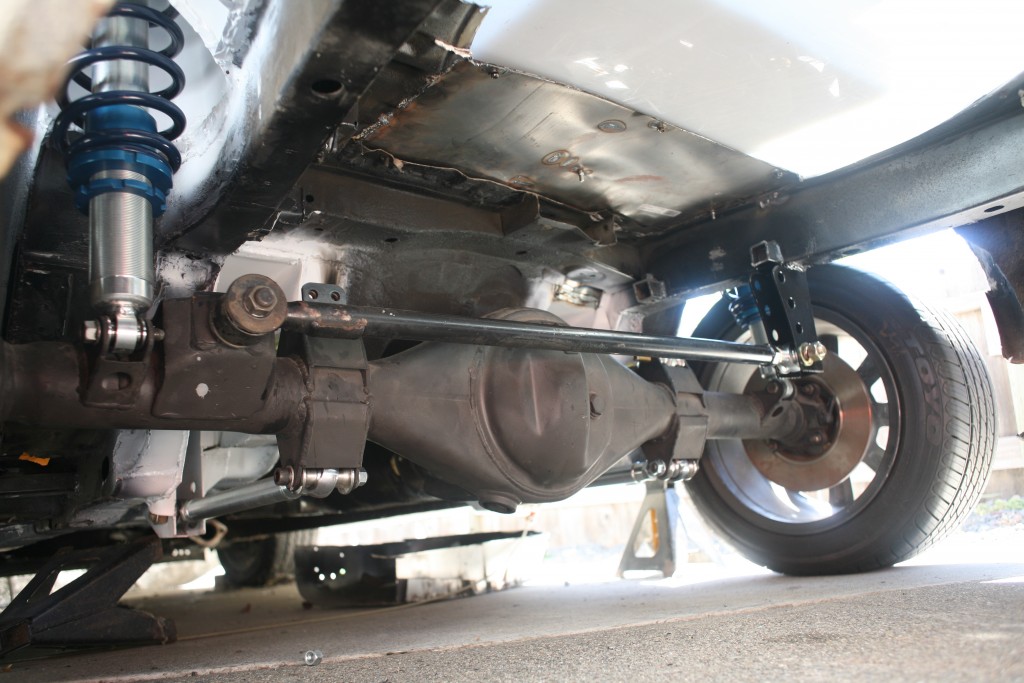
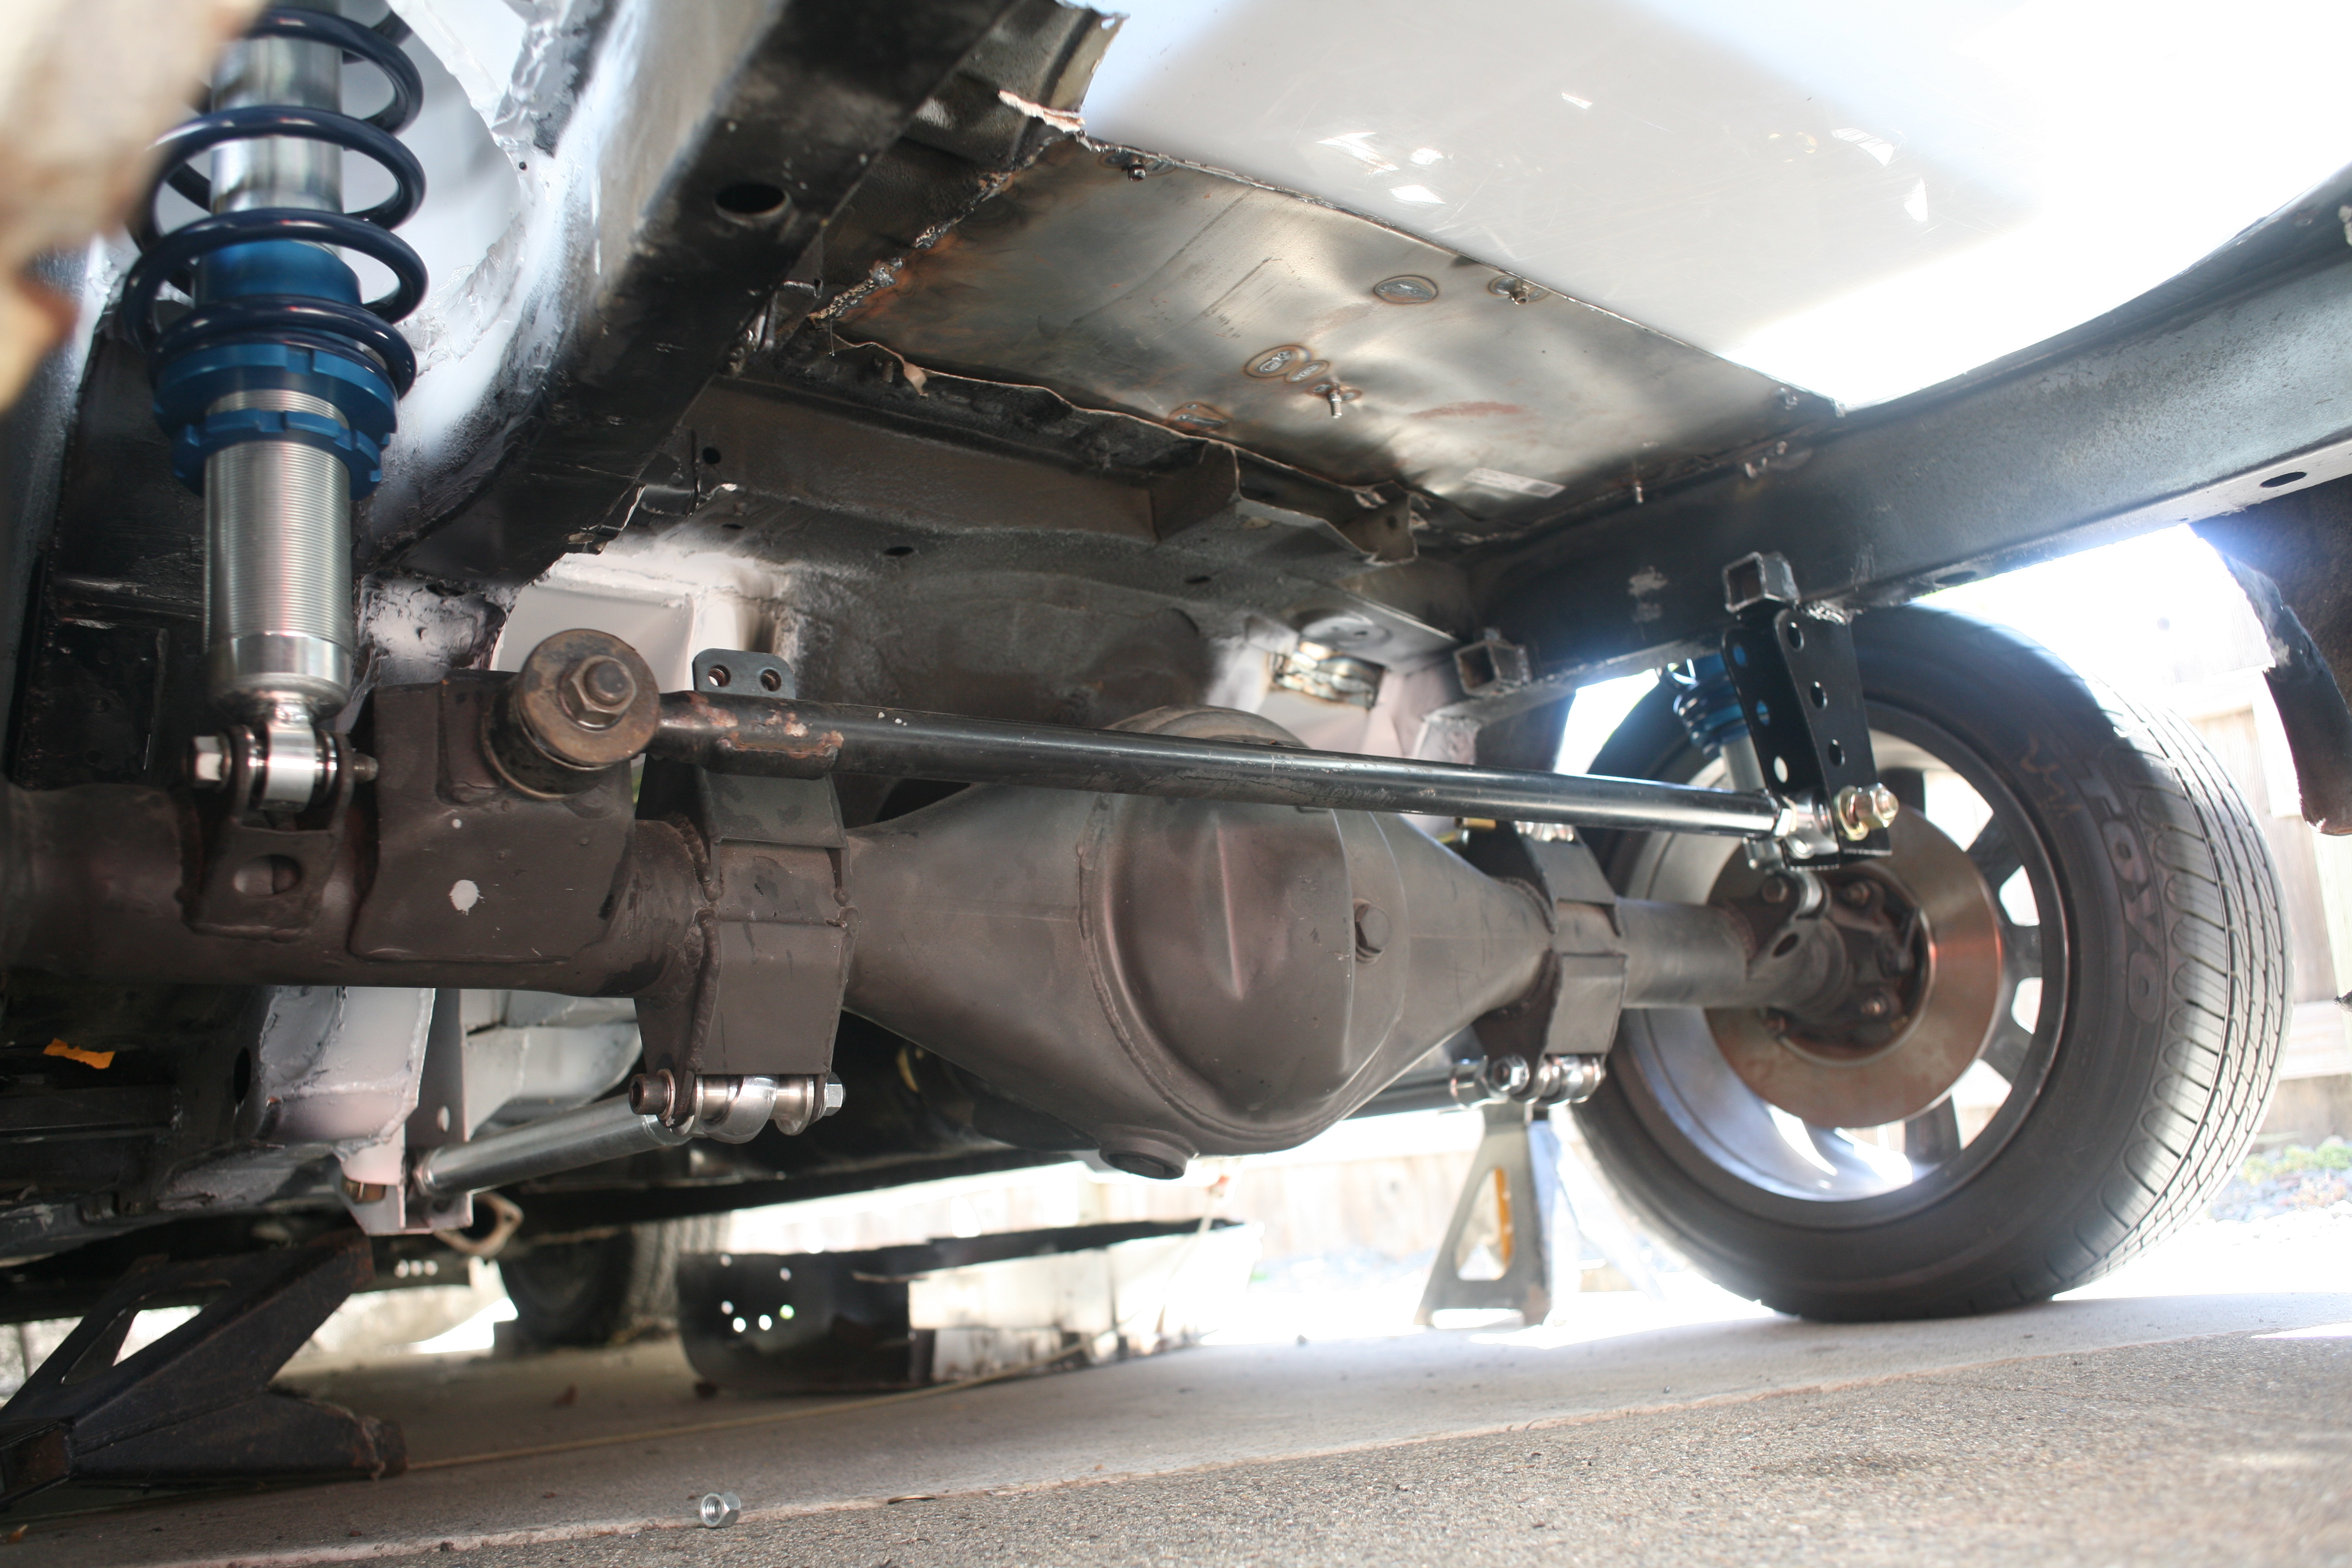
There is a kicker, however, as I needed to make a panhard mount. If you have just the four link holding the axle, its quite obvious why you need a bar on a different dimension. If you have no access to half-finished projects, and thus, no idea what I am talking about, the answer is that the axle swings side to side. To make it more complex, the stock RX-7 watts link is mounted at the front of the axle whereas the Toyota is to the rear. So now its rather close to the fuel tank, I’ll let you know how it works out, but my blind optimism thinks it will be okay. The image below shows the panhard bar in a rough draft form. I will be modding it to allow adjustment like the links. More on that later.
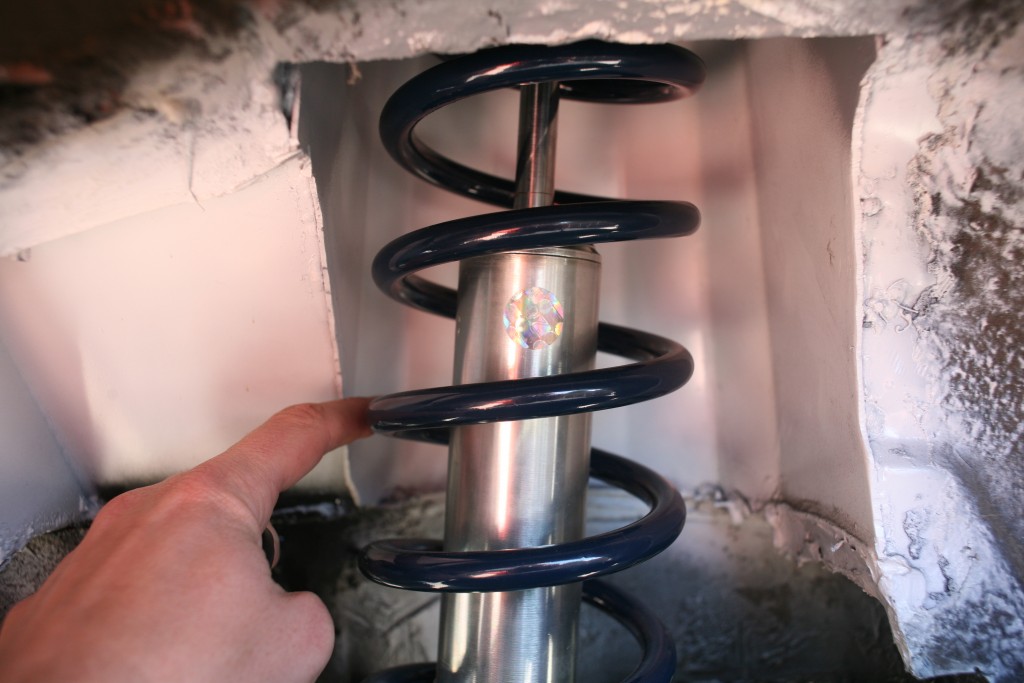
The finishing touch was the springs. I needed 16″ free length springs to reach the perch on the Bilsteins so I ordered the 150lb 2.5″ set from Speedway motors. After install, I promptly realized the springs hit the bodywork when the axle moved up. Turns out, the links were still too long. Frankly, I expected this since the axle was still not centered in the wheel well. If this article had already existed, then I would have anticipated such problems and did it right the first (or second time). But it didn’t and evidently time travel will not be invented in my lifetime, since I did’t go back to tell myself to get a better car. Thus, you owe me for this wonderful advice. I accept donations in the form of cream stouts, pork tamales, and/or silver quarters.
Space-time continuum aside, I used the power of measurements and mathematics to decide on a 13″ tube length to get the axle centered. This changed the angle the dampers met the axle and solved the spring clearance issues (by a finger width). Huzzah! I still need take-up springs for the coilovers, but the car is on the ground. Once I’m sure the welding and hacking is completed, ill touch it all up and paint underneath so it doesn’t look so damn haggard.

[…] Its sounds like I’ve accomplished quite a bit, but I really hadn’t. There was a fair amount of time lost in stitch welding, putting in the towers, and hundreds of other small tasks. Next time we will look at how you fit a 6′ foot tall guy in a small car with a roll cage, as well as the fine art of making a four-link from scratch. (That article is HERE) […]
Comments are closed.